Describe How to Perform a Starter Bench Test.
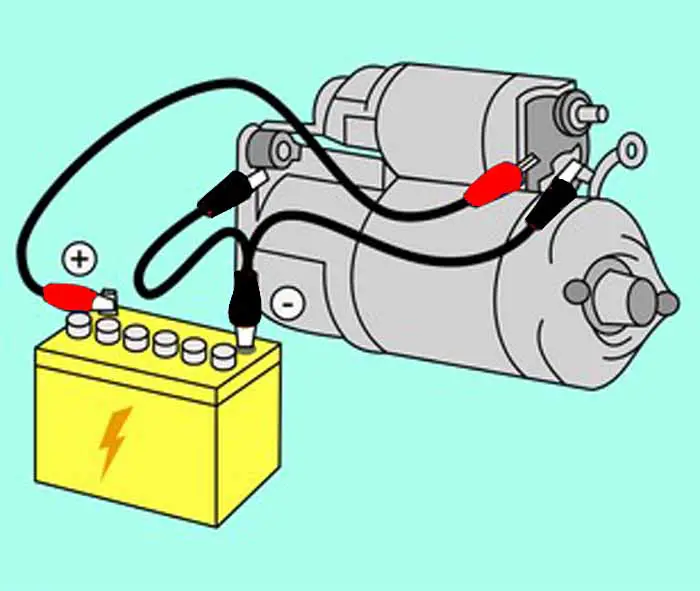
This is where the wires are attached to both the battery and the starter. Hook the negative battery cable to the negative battery post and the positive cable to the positive post.
Part 1 How To Bench Test A Starter Motor Step By Step
Only hold the leads to the starter for a few seconds before removing the leads.
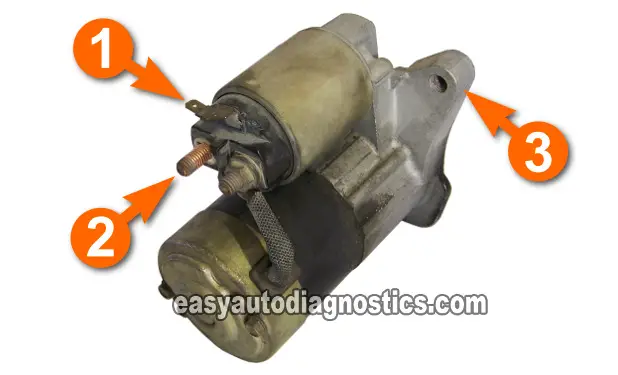
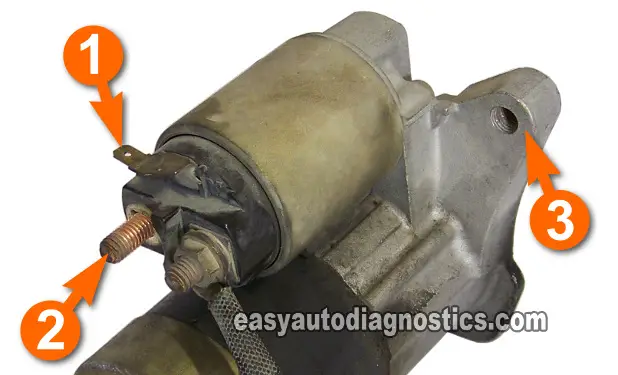
. Wear a pair of gloves and goggles. The other end will need to be attached to the starter case. Attach the other end of this wire to the case 3 of the starter motor.
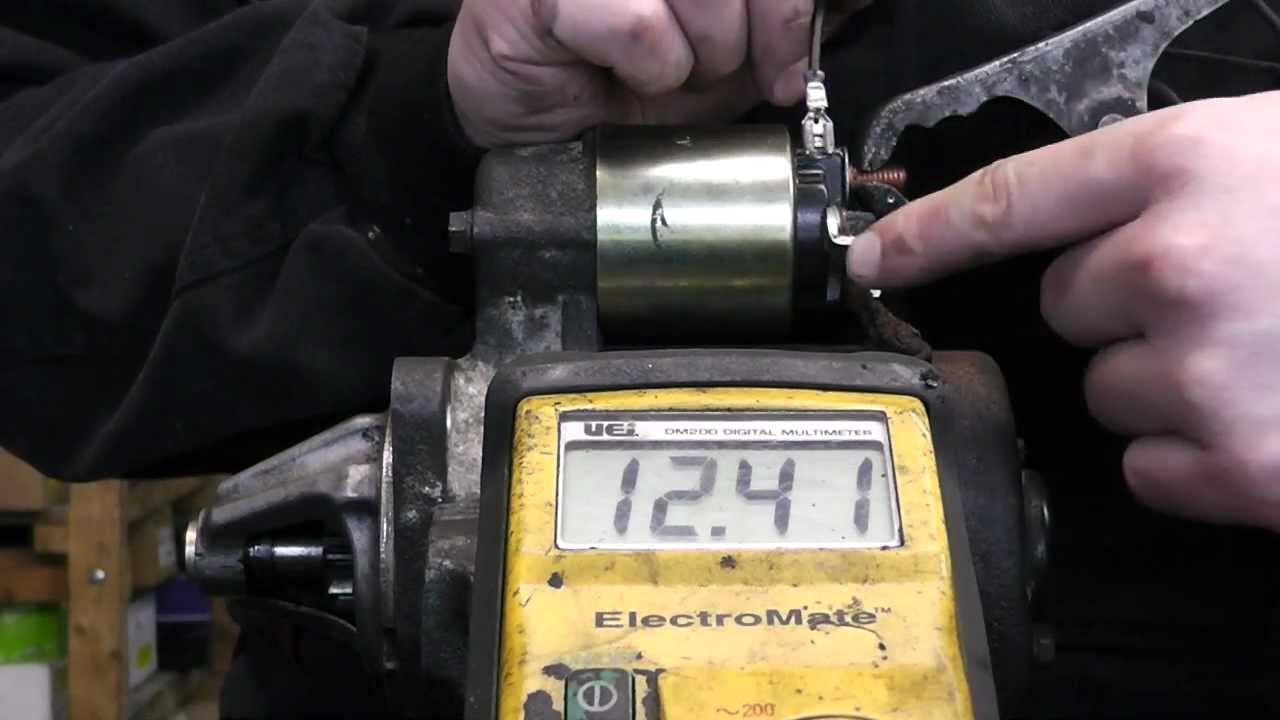
Starter Current Draw Test. Bring the engine to normal operating temperature before performing this test. You may want to put the starter in a vise to hold it secure because the starter has a little force behind it.
Attach the positive RED battery cable to the positive terminal on the battery. Theres no need to pull the starter to check that. Visually inspect the starting system for any physical defects or loose connections.
The Positive goes to the big terminal on the solenoid. On the other end connect the negative cable to the negative starter contact. How to Bench Test a Starter Motor Step by Step.
Hold the black lead to the solenoid housing and the the red lead to the terminal on the starter solenoid. Perform a current draw test after the battery has been checked and found to be fully charged and in good condition. The principles are universal for all starters although some star.
You can ask someone to help you. Using a Jumper Wire. It should click and the starter should whirrrrr.
Jump from the big terminal to one of the smaller ones with a jumper wire or a screwdriver blade to actuate the solenoid. Attach the negative BLACK battery cable to the to the negative terminal of the battery. You need to locate both the battery and starter which is located under the hood of the lawnmower.
Attach the RED wire of the battery jumper cable to the positive terminal of the battery. Demonstration on both a new and old starter so you can see the difference in performance. This is where the StartCrank wire is attached to.
You can get a general idea about the starter by putting jumpercables on your car battery the black ground cable on the starter housing and the red positive cable briefly on the terminal that connects over to the solenoid. Place your starter in the vise or have someone hold it carefully. Holding it down with your foot prevents it from jumping around and causing injury.
Place your starter in the vise or have someone hold it carefully. The other end will need to be attached to the starter case. If the starter turns over thats a good sign but not a guarantee.
And tap the the positive contact on the starter. The other end needs to be. School of Transportation TechnologyFanshawe CollegeLondon Ontario Canada.
Raise the hood to uncover them. Be careful of the spinning pinion gear. When you bench test the starter it may move around and shoot some sparks.
Hold the starter down with one foot. Next locate the electrical posts. When you turn the ignition switch to StartCrank this wire delivers 12 Volts to activate the starter solenoid.
Then you will need to. On a bench test the negative battery jumper cable goes to the vice that is holding the starter by the frame. Attach the negative BLACK battery cable to the to the negative terminal of the battery.
Touch the free jumper cable leads to the starter solenoid. Disconnect the jumper cables from the battery when finished with this step. Tools you will need-Jumper Cables-12V Jumper Wire-Automotive Batte.
Not sure about bench testing the alternators but you can bench test a starter by removing it from the engine placing it in a vice on the bench or some other way of securing it so it wont jump off when you engage it then attaching negative to the body of the starter positive to the bolt terminal on the back where the positive cable bolts on as opposed to the earth and. This in turn makes the starter motor work. Page 2 of 2.
Attach the BLACKBLUE wire of the battery jumper cable to the negative terminal of the battery. This is a quick tutorial on how to bench test a Starter on a gas or Diesel powered engine. More Info on testing a NO CRANK Condition.
Attach the positive RED battery cable to the positive terminal on the battery. Attaching the Power and Ground Circuits. This is where the cable from the battery is attached to.
Have them hold the starter down securely with a booted foot while you perform the test.
How To Bench Test Starter Motor Youtube
Part 1 How To Bench Test A Starter Motor Step By Step
How To Test A Starter Motor With Multimeter On Car Bench Test

How To Bench Test A Starter Youtube


Comments
Post a Comment